 The current hype in the digital world is HDR, or High dynamic range images. Basically it is the process of taking multiple images with bracketed exposure which are then combined by some clever algorithms in the software to create a single image.
For years film photographers have dodged and burned images to expand the dynamic range of their images. Of course it was also used simply to improve the impact of the image. We have also had graduated neutral density filters to adjust images in camera long before we left the world of cellulose for bits and bytes.
Granted there is a big issue with digital cameras in that their ability to capture tonal range is not near what film did, so that the tricks of the film days are now an essential requirement to get images that meet or exceed the standards of film.
Now it may come as a surprise to some people to find out that HDR is really nothing new, digital photographers have been layering multiple images with bracketing for as long as photoshop has been around, the real difference is that now it is so much easier and faster to do, well sometimes at least.
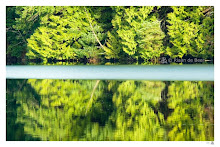
I shot the image above a few months ago at Tunstal Bay here on Bowen Island. the light conditions for this sunset ranged by about 3 f-stops. I bracket my landscape shots as a matter of course. It is partially a left-over from my film days and partially because digital cameras are in many ways less forgiving of lighting mistakes with their limited tonal range and noise issues.
So how did I get this exposure even between the vibrant sky and almost dark beach. I bracketed 5 shots from -2 to +2 F and selected the brightest image that did not clip the whites, by reviewing the histogram in lightroom. This is a critical point. Although you can "brighten" up a RAW file after the fact by almost 2 stops, it comes at a cost in terms of noise. However darkening the image does not add any noise at all. The secret to noise free images with deep tonal range is to shoot your exposures as bright as possible without loosing the highlights (a blown out white is always white, no matter how much you darken the image) and then to pull them back in whichever RAW converter is used to balance the exposure.
I applied an electronic graduated neutral density filter by using the lightroom tools to darken the sky by 2 f stops. and presto, done. It took all of 15 minutes from selection the image to printing a jpg for the web.
, no layering in photoshop and no complicated software processes. Something like this would have taken me half a day of trial and error in the darkroom to burn the sky under the enlarger. That is what I love most about the digital world, quick results that allows you more time for shooting and faster feedback which increase the learning curve.
That is also why I have not used the HDR buttons in photoshop or any of the other dedicated HDR programs. After frustrating myself with it for an hour and not seeing any decent results I gave up.
I would rather shoot pictures than sit behind the computer, and the old school tools can give you great fast results if you plan for it in your shooting and get the image exposed right in the camera.

No comments:
Post a Comment